Following some recent interest in a newsgroup question I answered earlier this year, about how to make Shape Data hyperlinks live in a web page, I thought I'd describe the steps in a little more detail. My discovery of this workaround is due to Chris Roth (aka the VisGuy.com) for pointing out the likely direction to look for a solution, so my thanks to you Chris.
Save as Web Page
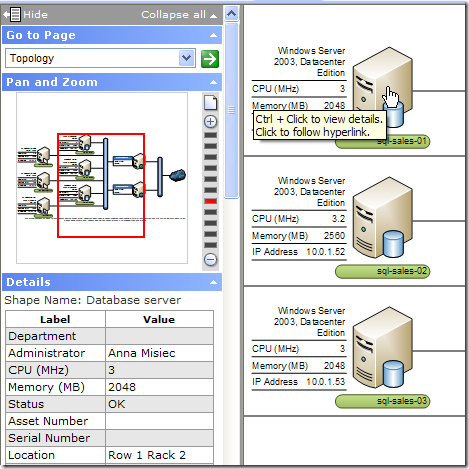
Visio's Save as Web Page feature is a very useful tool for publishing your diagrams to a wider audience. It allows you to pan and zoom around your page, view shape level data and adds search and navigation functionality all via the browser.
Although there are a number of options that can be set during the save process, the standard output produces a page, as per the above image, consisting of a frame on the left hand side and a main diagram content on the right.
Behind the scenes, what's actually produced is an HTML document and, in the same location as the web page, a folder containing all of its supporting files. Look within this folder and you'll see the following:
- images (representing, amongst other things, your shapes)
- a CSS style sheet (that describes the page's presentation)
- XML files (holding Shape Data)
- JavaScript files (adding various behaviours and functionality to the page)
Hyperlinks - Dead or Alive
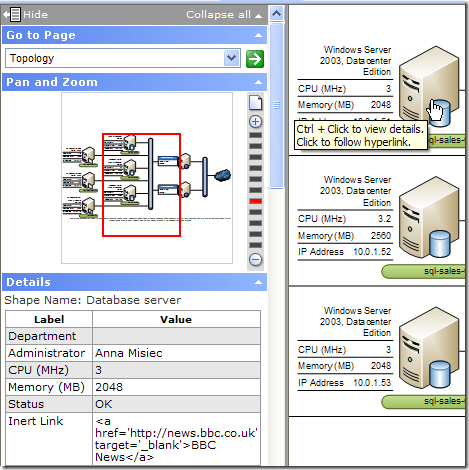
Under normal conditions links can be added to shapes via Insert / Hyperlinks... or directly to the Hyperlinks section of the ShapeSheet. These links are then accessible and live in the subsequent Save as Web Page output. However, if you wanted to add, say, 'http://news.bbc.co.uk' to a Shape Data row ('Custom Property' prior to Visio 2007) the result would be just plain text and no link at all. Now, a way to get around this might be to enclose your link in an HTML anchor tag to trick the web page into 'seeing' it as a real link. For example:
But, what you'll see in the web page is, once again, just a plain string:
Escaping Links
The culprit here can be found within one of the JavaScript support files - "frameset.js". What's happening is that every time a shape is selected in the diagram page, a JavaScript function (CreatePropTable) retrieves the respective Shape Data and builds the table in the left hand frame under the heading 'Details'. As part of this process, the retrieved strings are cleaned using an HTMLEscape function that replaces any HTML defined characters to prevent them from becoming part of the page's markup. For example '<' becomes '<' and '&' becomes '&'.
Of course, making the link part of the page's markup is exactly what we're trying to achieve. So, to prevent the string from being 'escaped', you just need to modify the part where it gets called and, in order to make use of existing 'http://www...' links, wrap up the string in an anchor tag. The following walkthrough sets out how to go about this:
Walkthrough
1) Save you Visio document using File / Save as Web Page...
2) Find the support folder, which should be in the same location as the web page you just saved, and find the 'frameset.js' file.
3) Right-click on the file and select Open With / Notepad. (NB - You can use any text editor or a more complex application like Visual Studio 2008, which now offers JavaScript intellisense.)
4) Search the file for "if (oPropValue)" (there's only one instance of this)
and replace the following:
if (oPropValue)

{

    strValueText = HTMLEscape (oPropValue.text);

}
...with:
if (oPropValue)

{

    if (String(oPropValue.text).substring(0,4) == "http")

    {

        strValueText = "<a href='" + String(oPropValue.text)

          + "' target='_blank'>" + String(oPropValue.text) + "</a>";

    }

    else

    {

    strValueText = HTMLEscape (oPropValue.text);

    }

}
5) Save the file and close.
If you're new to JavaScript, what's happening here is that at the point where you're handed the Shape Data string (oPropValue), you check the first four characters to see if they equal 'http'. If it does then you just wrap it up in an HTML anchor tag; if not just carry on as normal.
Once you've edited the frameset.js file you can just save a copy in another location and then replace any subsequent ones, generated by the Save as Web Page process, with your edited version.
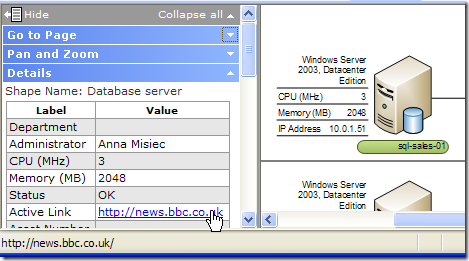
The result of the above can seen in the following image:
Closing thoughts
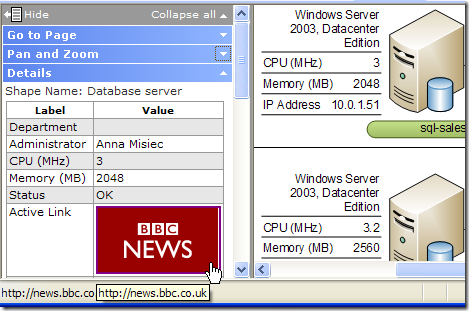
The above will work for both http and https based URLs but, in essence, what you're doing here is searching the Shape Data to match a specific criteria and producing some markup based on the result. Therefore, you're not just limited to straight hyperlinked text but, any other markup you choose. For example, you could search the Shape Data string for the name of an image and, as long as you added the image file to the support folder, this would be displayed as well:
There are probably limits to how far down this route you want to go before starting to think about creating your own Save as Web Page output using the Save as Web Page API, but a lot of work has already gone into the JavaScript end and it's worth getting to know it a little better.
For other interesting blogs surrounding hyperlinks in web output check out David Parker's recent post Importing Hyperlinks into Visio Shapes and Chris Roth's Customized Visio HTML Export.


