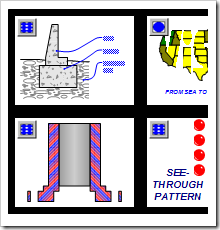
Following on from the previous post on creating custom line patterns, in this post I'm going to look at ways to produce a random pattern such as a pencil effect...
Vector or Raster?
An early decision to make when you create line patterns is whether you decide on a vector based pattern using Visio's own line drawing tools or an imported bitmap image. Both options have their advantages and disadvantages:
Bitmaps can represent real world objects - With an image you can, of course, show patterns such as rope or other detailed materials and surfaces. in a way that would be difficult to replicate if drawn by hand.
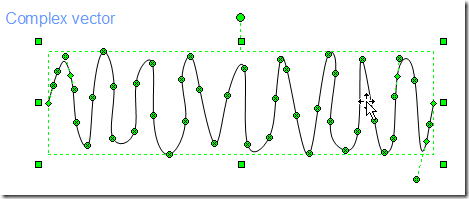
Bitmaps perform better than complex vectors - In tests I carried out, where I dropped 1000 line shapes using the patterns below, the complex vector pattern gave the CPU a lot of work and was clearly slower to subsequently interact with than the bitmap and simple vector patterns. (Note - the complex vector below is described using NURBS formulae giving Visio plenty to think about, where as the simple vector is just a series of Line To geometry rows.)
Bitmaps don't scale well - Being made up of individual pixels, bitmaps don't behave well when stretched. This may be acceptable with random patterns, as the result may be just to blur the image slightly. However, for real world object such as the rope you will need to be quite careful how the pattern is stretched along the length of the line.
Bitmaps colours are fixed - While vector line patterns, which are originally drawn in black, can have their colour changed in the drawing, with bitmaps the colours are fixed to the original. (An extra note about vector line colours - Any colour in a pattern shape, aside from black, remains unaffected by line colour changes being made to the actual line. A good tip from John Marshall [who gives original credit to Graham Wideman] is that if you want a black pattern to stay black by using an 'virtually' black colour such as #fffffe.)
Bitmaps in patterns don't support transparency - Custom line patterns don't support transparency in images. This means, for example, that the non-black areas in the bitmap above are actually white and show particularly at the ends of the lines and whenever the line runs over the top of another shape.
A random pattern
So, on to creating the pattern itself. I'm going to create a pencil effect and have exported an image of a pencil brush from Expression Design to use as the pattern. If you have other drawing applications then you may find you can borrow from them otherwise you might be able to crop an image from Bing - Images.
It's worth spending a little time cleaning up the image to ensure that both ends match. You can do this by zooming right in and editing the end pixels using Windows Paint:
This end-matching principal applies to vector drawn shapes as well. In the 'complex vector' example further up you can see that both end points terminate at the same height and that their respective approach angles roughly mirror each other.
Once you've finished editing the image, you're ready to use it in your diagram. Here's a quick walkthrough:
- Right click on the Line Patterns folder in the Drawing Explorer and select New Pattern...
- The pattern Master editing window should be open so you can select Insert / Picture / From File... to add your new pencil image.
- Now draw a rectangle on the page and adjust its width to be exactly the same as the image shape and its height to be half that of the image.
- Select both shapes and from the menu, navigate to Shape / Align Shapes... and click the 'centred' buttons for both Vertical and Horizontal alignment.
- Deselect both shapes. Select just the new rectangle and click Shape / Grouping / Convert to group.
- With the rectangle still selected, select Window / Show ShapeSheet and find the LockCalcWH cell in the Protection section. Change the cell value to 1 and close the ShapeSheet.
- Again, with the rectangle still selected, use the Format / Line... and Format / Fill... and change the pattern options for both to None.
- Select both shapes clicking Ctrl+A and select Shape / Grouping / Add to group.
- You should now have a shape looking something like this:
Nothing's perfect...
There are a couple of points where the bitmaps don't appear to behave as we'd wish, namely, how the pattern is applied to corners and how it joins on closed paths.
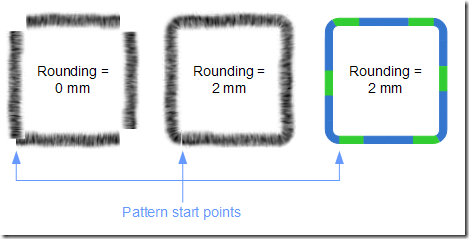
Applying the pattern to a standard rectangle results in four overlapping lines, which is not a great effect. However, you can fix that by applying a small amount of corner rounding that enables Visio to treat the pattern as a continuous line:
Looking at the above, I was wondering whether Visio then treats the rounded rectangle as having eight lines (ie four straight lines and four corner radiuses). However, in the third green and blue example you can see that this is not the case as the pattern starts with the green block and is then applied anti-clockwise with a continuous pattern being bent around each corner.
For closed paths such as the above rectangles or an ellipse, a small gap appears between the beginning and end of the pattern path. This is visible at the starting point of the geometry (usually bottom left for rectangles).
Final thoughts
Well, I'm not advocating here that all line patterns should be image based. Far from it. I think the vector route would likely be the best way to go in most cases. However, there are some cases where an image, albeit with a few foibles, may work better and if you find yourself in this situation then I hope the post helps.
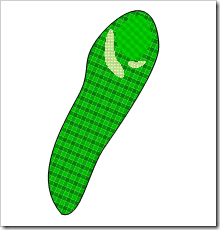
I'd like to thank John Marshall for some technical advice in writing this post. Thanks for your help John. And also to Chris Roth who generously donated the four custom patterns files below, which are a great demo of what's possible...
[UPDATE 050808 - I've updated the first image below to reflect not just the line patterns themselves, but the clever use of custom line ends. I haven't really covered line ends in these posts, but matching ends clearly demonstrate awell finished shape.]
Examples
"Thanks to Iaian from the Dublin Visio Corp. office."
"Pretty self-explanatory. They look good, anyway!"
LineWeightAnd-CustomLinePatterns.vsd
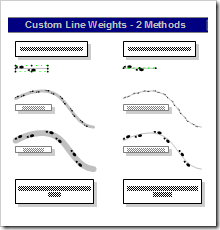
"Two examples of how to control the size of line patterns: use a really thick line weight, or make the pattern bigger than the actual line thickness. I made this for my own personal Visio development class, that I actually taught once!"
"A set of line, fill, arrow patterns that I made for Visio Corp's Visio Development course."
[Update 28.04.2012 - I've recently noticed that Graham Wideman has a page on 'Visio fill, line and end patterns', which is a must read once you've got to the end of this post.]

